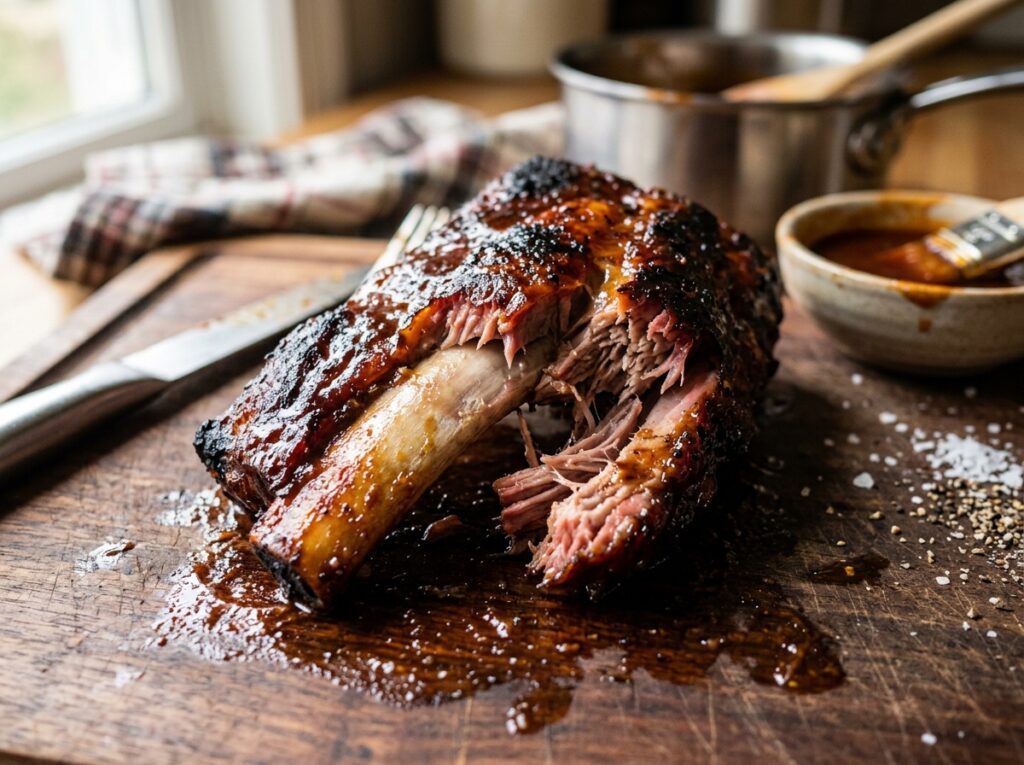
You don’t need a restaurant smoker or a wall full of gear to make great ribs at home. You just need steady heat, a little patience, and a method that makes sense.
The 3-2-1 ribs recipe works because it gives every stage of the cook a job. Smoke builds flavor. The wrap softens the meat. The final hour firms up the outside so your ribs don’t taste steamed.
Quick Facts: Cook temp: 225°F. Total time: about 6 hours plus rest. Best cut: St. Louis or spare ribs. Serves: 4 to 6.
What the 3-2-1 ribs method really means
The 3-2-1 ribs method is a simple smoking formula: 3 hours unwrapped, 2 hours wrapped, 1 hour unwrapped. That’s it. It’s not a secret code. It’s just a timing guide for cooking pork ribs low and slow.
The first 3 hours build bark, color, and smoke flavor. The next 2 hours happen inside foil, where the trapped heat and moisture help break down connective tissue. The last hour dries the surface back out a bit and sets your sauce.
Think of the wrap stage like covering a pan of food in the oven. Once steam gets trapped, things soften fast. That’s great for tenderness. It’s not so great if you leave the ribs wrapped too long.
One thing many recipes skip? 3-2-1 works best for larger pork ribs, especially spare ribs or St. Louis-style ribs. Baby backs are smaller and leaner, so they can overcook on the full schedule. If you want a deeper timing breakdown after this recipe, this 3-2-1 ribs guide is a helpful extra read.
It also helps to know your cut. Pork ribs behave very differently from beef ribs. If you’re still sorting that out, this quick look at beef ribs vs pork ribs clears up size, fat, and cook-time differences.
Quick Fact: The classic 3-2-1 timing was built around 225°F and larger pork ribs. Treat it like a map, not a law.
Ingredients and gear for a great 3-2-1 ribs recipe
For this recipe, keep it simple. You want enough seasoning and sweetness to build classic barbecue flavor, but not so much that the sugar burns or the wrap turns syrupy.
For 2 racks of St. Louis-style pork ribs, gather these:
- 2 racks pork spare ribs or St. Louis-cut ribs, about 2.5 to 3 pounds each
- 2 tablespoons yellow mustard or hot sauce as a binder
- Dry rub: 4 tablespoons brown sugar, 2 tablespoons paprika, 2 teaspoons kosher salt, 2 teaspoons black pepper, 2 teaspoons garlic powder, 1 teaspoon onion powder, and 1/2 teaspoon cayenne
- Spritz: 1/2 cup apple juice mixed with 2 tablespoons apple cider vinegar
- For the wrap: 4 tablespoons butter, 2 tablespoons honey, 2 tablespoons brown sugar, and 1/4 cup apple juice
- 1/2 to 3/4 cup barbecue sauce for the final glaze
- Apple, cherry, hickory, or pecan wood, plus heavy-duty foil
If you already have a favorite store-bought rub, use it. No need to make life hard. About 1/4 cup of rub per rack is usually enough.
For gear, you’ll need a smoker or grill set up for indirect heat, tongs, a sheet pan, foil, and a knife for trimming. A stable cooker matters more than a fancy one. Still, if you’re shopping for an easy set-and-hold option, this roundup of the best pellet grills is worth a look.
A thermometer helps too, even with ribs. Numbers won’t tell the whole story, but they do keep you from flying blind.
Pro Tip: Keep the ribs chilled until your smoker is ready. Safe food handling still matters, even on barbecue day.
How to make 3-2-1 ribs step by step
Step 1: Prep and season the ribs
Start by flipping the ribs so the bone side faces up. You’ll see a thin, shiny membrane on the back. Some racks come with it already loosened, but most don’t.
Slide a butter knife under one corner of that membrane. Grab it with a paper towel and pull. If it tears, don’t worry. Just grab another section and keep going. Removing it helps the seasoning stick and makes the ribs easier to bite through later.
Pat the ribs dry. Rub a light coat of mustard or hot sauce on both sides. You won’t taste much of it after the cook, so don’t overthink it. It mostly helps the rub cling to the meat.
Now season the ribs well. Cover both sides, but give the meat side a little more attention. Let the ribs sit for 20 to 30 minutes while your smoker comes up to temperature.
Set your smoker to 225°F. For wood, apple and cherry give you a sweeter, lighter smoke. Hickory adds a stronger barbecue flavor. Pecan sits nicely in the middle.
If your cooker runs a bit dry, a water pan can help soften temperature swings. If it already holds moisture well, skip it.
Step 2: Smoke the ribs unwrapped for 3 hours
Place the ribs in the smoker bone-side down. Give them some space if you’re cooking more than one rack. Air and smoke need room to move.
Close the lid and let the smoker do its job. That’s the hard part for a lot of people. You smell the smoke, you get curious, and next thing you know you’ve opened the lid six times in one hour.
Try not to do that.
Your smoker is a lot like an oven with attitude. Every time you open it, heat drops, cook time stretches, and bark development slows down.
At around the 90-minute mark, check the surface. If the ribs look dry, give them a light spritz with the apple juice and vinegar mix. Once every 45 minutes after that is plenty. You’re not washing a car here. A light mist helps. Soaking the ribs doesn’t.
By the end of the first 3 hours, the ribs should look deeper in color, usually a rich reddish brown or mahogany shade. The rub should feel set on the surface. You’re not looking for tenderness yet. At this stage, they often still feel a bit tight.
If you stick a thermometer in the thickest part between the bones, you may see something in the 160s or 170s. That’s normal. Tender ribs need more time.
Step 3: Wrap the ribs for 2 hours
Now comes the part that makes a 3-2-1 ribs fall-off-the-bone recipe work so well.
Lay out two overlapping sheets of heavy-duty foil for each rack. Add a little butter, honey, brown sugar, and a splash of apple juice to the foil. You don’t need much. A few tablespoons create steam. Too much turns the bark mushy.
Place the ribs on the foil and seal them tightly.
Some pitmasters put the ribs meat-side down during the wrap so the meat sits in the butter and sugar. That gives you a richer, sweeter finish. If you want to protect your bark more, keep them meat-side up. Both ways work. If this is your first time, meat-side up is easier and less messy.
Put the wrapped ribs back on the smoker for 2 hours at 225°F.
This is the stage where collagen and connective tissue break down faster. The meat loosens. The bones start to show a little more. The whole rack becomes much more flexible.
Check at the 90-minute mark if your ribs are on the smaller side. Thin racks can move from tender to too soft pretty fast during the wrap.
Pro Tip: Use less liquid in the foil than you think you need. Steam is doing the real work here, not a bath of juice.
Step 4: Finish the ribs unwrapped for 1 hour
After the wrap, the ribs are usually close. Now you want to firm up the outside and set the glaze.
Carefully open the foil and keep your face back.
Warning: Wrapped ribs release very hot steam. Open the foil away from your hands and face.
Put the ribs back on the smoker bone-side down. Brush on a thin layer of barbecue sauce. Thin is the key word. A heavy layer can get sticky in a bad way and hide the smoke flavor you spent hours building.
Let the ribs cook unwrapped for 30 to 60 minutes.
If your sauce is very sweet, wait until the last 20 to 30 minutes to brush it on. Sugar burns faster than people think, especially if your cooker runs hot in spots.
For true fall-off-the-bone softness, let that final stage go closer to the full hour if the ribs still feel snug. If you want a cleaner bite, 30 to 40 minutes may be enough.
Once done, rest the ribs for 10 to 15 minutes before slicing. That short rest helps the juices settle and makes the rack easier to cut neatly between the bones.
How do you know 3-2-1 ribs are done?
The biggest mistake people make with ribs is trusting the clock more than the meat.
Time gets you close. Texture tells you the truth.
Use the bend test and toothpick test
Pick the rack up from the middle with tongs. If the ribs bend easily and the surface starts to crack slightly on top, you’re getting close. If the rack stays stiff like a board, it needs more time.
Next, use a toothpick or probe and slide it between the bones. It should go in with very little resistance. Think warm butter, not cold peanut butter.
You can also look for bone pullback. That’s the little bit of bone showing at the ends, usually about 1/4 to 1/2 inch. It’s a useful clue, though not a perfect one by itself.
Let temperature guide you, not control you
A fast instant-read thermometer can help, especially if you’re new to ribs. Most tender pork ribs finish somewhere around 195°F to 203°F in the thickest meat.
Still, ribs are thin, curved, and full of bones. A number can fool you if the probe hits bone or slides through a thinner section.
So use temperature as backup. Use feel as the final judge.
Did you know? On the KCBS barbecue circuit, judges usually want ribs with a clean bite, not meat that drops off the bone by itself. At home, plenty of people love softer ribs. Neither camp is wrong. You just need to know what texture you want.
Adjust the 3-2-1 method for rib type and grill
A lot of frustration with ribs comes from using one timing rule for every rack and every cooker. That’s where good barbecue turns into guesswork.
Baby back ribs need less time
Baby back ribs are smaller, leaner, and usually more curved than spare ribs. If you cook them with the full 3-2-1 schedule, there’s a good chance they’ll get too soft.
A better plan for baby backs is often 2-2-1 or even 2-1.5-0.5, depending on thickness. If that’s what you’re cooking, this 2-2-1 baby back ribs method will fit better than the classic spare-rib schedule.
St. Louis ribs are the sweet spot for 3-2-1. They have enough fat and enough meat to handle the wrap without falling apart too early.
Pellet grills, charcoal smokers, and gas grills all work
Pellet grills make this recipe easy because they hold steady temps well. That’s a big reason so many home cooks like them.
Charcoal smokers and kettles work great too. They often give a deeper smoke flavor, but they need more hands-on fire control.
Gas grills can handle 3-2-1 ribs if you set them up for indirect heat and add a smoker box or foil packet of wood chips. The flavor won’t be as deep as an offset smoker, but you can still make tender, tasty ribs.
No matter what cooker you use, steady heat matters more than the logo on the lid.
Want a firmer bite instead of true fall-off-the-bone?
Then shorten the wrap.
That one change makes a huge difference. Try 3 hours smoke, 1 to 1.5 hours wrapped, then finish uncovered until tender. You’ll keep more bark, more structure, and a little more chew.
That’s a nice middle ground if you like ribs that feel tender but not pot-roast soft.
Common mistakes that ruin 3-2-1 ribs
Bad ribs usually come from a few repeat problems, not from bad luck.
Why ribs stay tough
If your ribs feel chewy, they likely needed more time in the wrap or more overall cook time. Ribs don’t become tender just because they hit a certain number on the clock.
Another common issue is heat that runs too low. If your smoker sits at 200°F instead of 225°F for half the day, the timeline stretches and the meat lags behind.
Opening the lid too often causes trouble too. Every peek slows the cook.
Why ribs turn mushy
Mushy ribs almost always mean one of three things happened: the rack was too small for a full 3-2-1 cook, the wrap had too much liquid, or the ribs stayed wrapped too long.
This happens a lot with baby backs.
It also happens when people think more butter, more honey, and more juice must mean better ribs. It doesn’t. A little support is good. Too much turns the foil into a braise.
Why the bark gets soft or the sauce burns
The bark goes soft because foil traps steam. That’s normal to a point. The final hour exists to fix that. If the ribs still feel wet on the outside after finishing, they probably needed more unwrapped time.
Burned sauce is usually a sugar problem. Sauce too early, and it darkens fast. Sauce too thick, and it turns sticky and heavy instead of glossy.
Use a light coat near the end and let it tack up slowly.
What to serve with 3-2-1 ribs and how to store leftovers
Ribs are rich, smoky, and a little sweet, so they pair well with sides that bring crunch, acid, or creaminess. Coleslaw, baked beans, potato salad, cornbread, pickles, and mac and cheese all work well. If you want ideas that fit barbecue naturally, these BBQ side dishes are a solid place to start.
If you have leftovers, refrigerate the ribs within 2 hours of cooking. They’ll keep well for about 3 to 4 days in an airtight container.
To reheat, place them in a covered pan with a small splash of apple juice or water and warm them at 275°F until hot. That usually works better than blasting them in the microwave, which can toughen the edges and make the sauce sticky.
You can freeze cooked ribs too. Wrap them tightly and use them within 2 to 3 months for the best texture.
4. FAQ Section
FAQ
Are 3-2-1 ribs better for spare ribs or baby back ribs?
3-2-1 ribs are usually better for spare ribs or St. Louis-style ribs. Those cuts are larger, fattier, and can handle the full six-hour schedule better. Baby back ribs are smaller and leaner, so they often overcook on a full 3-2-1 run. If you’re using baby backs, shorten the method to something closer to 2-2-1 or 2-1.5-0.5.
Should I smoke 3-2-1 ribs at 225 or 250?
225°F is the classic temperature for 3-2-1 ribs. That timing was built around low-and-slow cooking at about 225°F. You can cook at 250°F, but the ribs will usually finish faster, especially during the wrap stage. At 250°F, start checking earlier so the texture doesn’t go too soft. Use tenderness, not the clock, as your final guide.
Do I need to remove the membrane from ribs?
Yes, removing the membrane is a good idea in most cases. It helps seasoning reach the meat side better and makes the finished ribs easier to bite through. Some racks come with a thin or already-loose membrane, so it may not matter as much there. Still, if you can remove it, do it.
Can I make 3-2-1 ribs without a smoker?
Yes, you can make 3-2-1 ribs on a gas grill or even in the oven. You’ll still get tender ribs if you keep the heat low and follow the same general timing. What you’ll miss is the deep smoke flavor. On a gas grill, use indirect heat and wood chips in a smoker box or foil pouch. In the oven, you can still build color and tenderness, then finish under a broiler or on a grill to set the sauce.
Why aren’t my ribs falling off the bone?
They probably need more time, more wrap tenderness, or both. Tough ribs often mean the connective tissue hasn’t fully broken down yet. Check that your smoker stayed near 225°F, make sure the foil was sealed tightly, and test the ribs for bend and probe tenderness before pulling them off. If you want softer ribs next time, add 20 to 30 minutes to the wrap or finishing stage.
5. Conclusion
Ready to smoke a better rack?
If you want an easy place to start, this 3-2-1 ribs fall-off-the-bone recipe is hard to beat. It gives you a clear plan, helps you avoid dry or chewy ribs, and leaves enough room to tweak the texture to your taste.
Start with St. Louis ribs, hold your smoker near 225°F, and pay attention to how the rack feels near the end. After one or two cooks, you’ll stop chasing perfect timing and start trusting the meat. That’s usually when your ribs get really good.