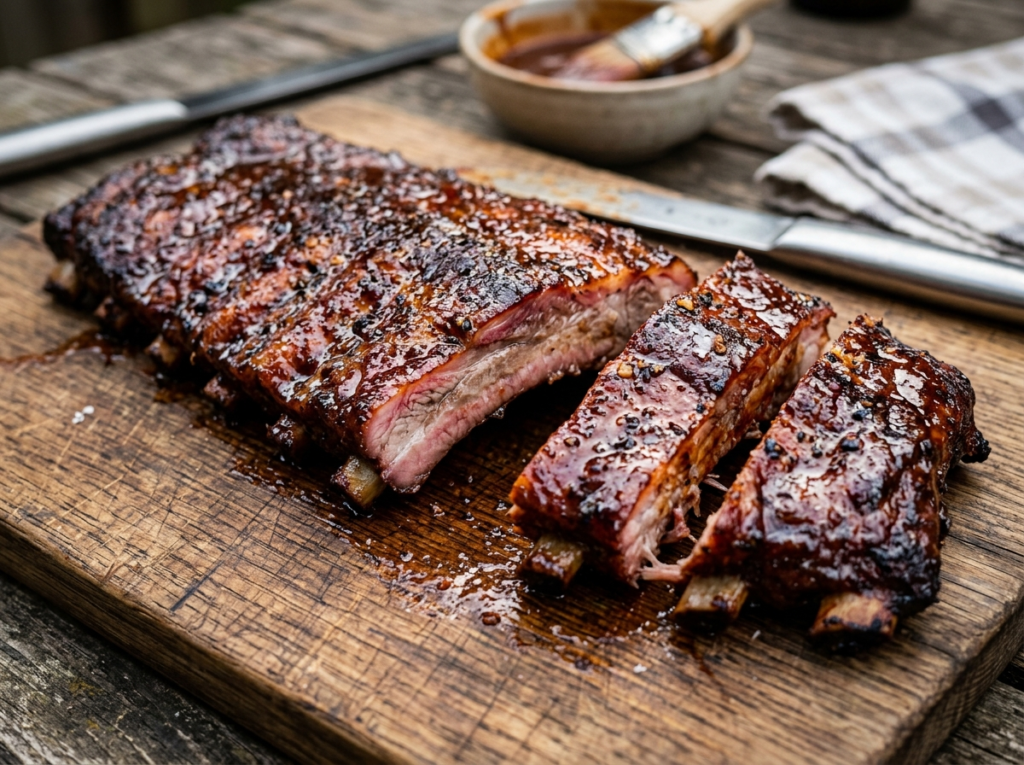
Most people who try smoking ribs at home end up with one of two disasters — tough, chewy slabs that feel like chewing on a leather belt, or mushy, overcooked meat that falls apart before it even reaches the plate. There’s a sweet spot between those two extremes, and the 3-2-1 method is how you find it every single time.
This three-phase approach has become the gold standard for backyard pitmasters because it takes the guesswork out of smoking spare ribs. You don’t need years of experience. You don’t need a $3,000 smoker. You just need to understand three numbers — 3, 2, and 1 — and follow the process. By the time you’re done reading this, you’ll know exactly how to smoke ribs that make your neighbors knock on your door asking what smells so good.
What Does “3-2-1” Actually Mean?
The 3-2-1 method breaks your entire rib cook into three distinct phases, each with its own purpose. The numbers refer to hours at a smoker temperature of roughly 225°F (107°C).
3 hours — Ribs go on the smoker unwrapped, absorbing smoke directly. This is where all that beautiful smoky flavor develops, and a bark starts forming on the outside.
2 hours — You wrap the ribs tightly in aluminum foil (sometimes with liquid and butter inside). The trapped steam and heat braise the meat, breaking down connective tissue and making the ribs incredibly tender.
1 hour — The foil comes off. You glaze the ribs with your sauce of choice and let them finish unwrapped. The sauce caramelizes, the bark firms back up, and you get that sticky, slightly crispy exterior everyone loves.
That’s it. Six hours total. Three distinct steps. One seriously impressive rack of ribs.
The beauty of this method is its simplicity. You aren’t constantly checking internal temperatures, adjusting vents every 20 minutes, or spraying the ribs with apple juice every half hour. Each phase has a clear start and end point, so you always know exactly where you are in the process.
Why the 3-2-1 Method Works So Well
There’s actual food science behind why this approach produces consistently good ribs.
Pork spare ribs contain a significant amount of collagen — the tough connective tissue that holds muscle fibers together. When collagen is exposed to low, sustained heat (between 195°F and 205°F internally), it slowly converts into gelatin. That gelatin is what gives properly smoked ribs their moist, silky texture.
The problem? If you just leave ribs on a smoker unwrapped for six straight hours, the exterior dries out long before the interior collagen fully breaks down. You end up with dry meat that’s technically “done” but doesn’t have that melt-in-your-mouth quality.
The wrapping phase (the “2” in 3-2-1) solves this. By sealing the ribs in foil, you create a mini braising environment. The meat’s own juices, combined with whatever liquid you add, generate steam. That steam accelerates collagen breakdown while keeping the meat moist. It’s basically a shortcut that protects your ribs from drying out during the most critical part of the cook.
The final unwrapped hour then lets you recover what the foil took away — a firm bark and caramelized sauce. Without this last step, you’d have tender ribs that look pale and steamed rather than barbecued.
What You’ll Need Before You Start
Getting your ingredients and equipment ready before you fire up the smoker saves you from that panicked mid-cook run to the store. Here’s what you need.
For the ribs themselves, you want St. Louis-style spare ribs or a full spare rib rack. The 3-2-1 timing was designed specifically for spare ribs — they’re thicker and fattier than baby backs, so they can handle six hours of cooking without drying out. If you’re working with baby back ribs, you’ll want to shorten the cook, and the 2-2-1 method for baby back ribs is a better fit for those.
For the rub, you can go store-bought or make your own. A solid homemade rib rub typically includes brown sugar, paprika, garlic powder, onion powder, chili powder, cumin, black pepper, and salt. The ratio is up to your taste, but a good starting point is equal parts brown sugar and paprika as your base, then about half that amount of each remaining spice.
For the wrapping phase, you’ll need heavy-duty aluminum foil (don’t use the thin stuff — it tears too easily), a couple tablespoons of butter, and a liquid of your choice. Apple juice is the classic pick. Honey, brown sugar, or even a splash of apple cider vinegar work great too.
For the sauce, use whatever barbecue sauce you love. Sweet, tangy, spicy, mustard-based — the 3-2-1 method works with all of them. Just make sure you’re applying sauce during that final hour, not earlier. Sugar-heavy sauces burn at sustained high temperatures, and even at 225°F over many hours, they can turn bitter.
For equipment, you need a smoker that holds steady temperatures. A pellet grill, offset smoker, kamado grill, or even a kettle grill set up for indirect cooking all work. You’ll also want a reliable instant-read thermometer and a good pair of heat-resistant grill gloves for handling the wrapped ribs.
Prepping Your Ribs the Right Way
Don’t skip this step. Proper prep makes a noticeable difference in both texture and flavor.
Removing the Membrane
Flip your rack of ribs bone-side up. You’ll see a thin, translucent membrane covering the back of the bones. This membrane (called the peritoneum) doesn’t break down during cooking. If you leave it on, it creates a tough, chewy layer on the bottom of your ribs that also blocks smoke and seasoning from penetrating the meat.
To remove it, slide a butter knife or the handle of a spoon under the membrane near one end of the rack. Once you’ve loosened a flap, grab it with a paper towel (bare fingers slip too easily) and pull it off in one smooth motion. It should peel away in a single sheet. If it tears, just grab the remaining piece and keep going.
Applying the Rub
Pat the ribs dry with paper towels. Some people like to apply a thin coat of yellow mustard as a binder before the rub — it doesn’t add much mustard flavor after cooking, but it helps the spices stick. Olive oil or even a light spray of cooking spray works the same way.
Apply your rub generously on both sides. Don’t be shy. You want a visible layer coating the entire surface. Once the rub is on, let the ribs sit for at least 30 minutes at room temperature before they hit the smoker. Some pitmasters refrigerate their rubbed ribs overnight, which lets the salt in the rub penetrate deeper into the meat — similar to a dry brine. If you have the time, overnight is the way to go.
Phase 1: The Smoke (3 Hours)
Get your smoker running at a steady 225°F. The wood you choose matters here because this is the only phase where your ribs absorb smoke directly.
Hickory is the classic choice for pork ribs — strong, bacon-like flavor that pairs perfectly with the richness of spare ribs. Apple wood gives a milder, slightly sweet smoke if you prefer something more subtle. Cherry wood adds a beautiful reddish tint to the bark along with a mild fruity flavor. You can also mix woods — a combination of hickory and cherry is popular for good reason.
Place your ribs on the grate bone-side down, meat-side up. Close the lid and resist the urge to keep opening it. Every time you lift the lid, you lose heat and smoke, and your smoker needs several minutes to recover. A good rule to follow: if you’re looking, you’re not cooking.
During these three hours, you’ll notice the exterior of the ribs darkening and developing a crust — that’s the bark forming. It’s a combination of the rub, rendered fat, and smoke particles building up on the surface. The color will range from deep mahogany to almost black depending on your rub ingredients and wood choice. Dark bark doesn’t mean burnt. It means flavor.
Pro Tip: You can spritz the ribs lightly with apple juice or apple cider vinegar once per hour during this phase. It adds a tiny bit of moisture and flavor, and the acidity helps the bark set. But this is entirely optional — plenty of pitmasters skip spritzing and get perfect results.
After three hours, your ribs should look noticeably darker, and the meat will have pulled back slightly from the ends of the bones. Don’t worry if they still feel firm. They’re not done yet — that’s what the next phase is for.
Phase 2: The Wrap (2 Hours)
This is where the magic happens.
Tear off two large sheets of heavy-duty aluminum foil — each one should be about twice the length of your rib rack. Lay them out flat, slightly overlapping.
Place the ribs meat-side down on the foil. Before you seal the wrap, add your braising ingredients on top of the bone side. A common combination is two tablespoons of butter, a drizzle of honey, and about a quarter cup of apple juice. Some people add brown sugar or a dusting of extra rub. There’s no wrong answer here, but the liquid and butter are doing the important work — the liquid creates steam, and the butter adds richness.
Wrap the foil tightly around the ribs, making sure there are no gaps or holes where steam can escape. You want a sealed pouch. If you’re worried about foil tearing (especially around the bone tips), you can double-wrap with a second layer.
Place the wrapped ribs back on the smoker, still at 225°F. During these two hours, the internal temperature of the meat climbs past 195°F, which is the threshold where collagen really starts converting into gelatin rapidly. The trapped steam and liquid accelerate this process.
Here’s something to keep in mind: smoke won’t penetrate the foil, so these two hours are purely about tenderizing. Your ribs already absorbed plenty of smoke during Phase 1. That smoky flavor is locked in.
Warning: Don’t extend this phase to three hours thinking “more wrapping = more tender.” Overcooking in foil is the number one reason people end up with ribs that are mushy rather than tender. There’s a difference between fall-off-the-bone and fall-apart-in-your-hands. Two hours is the sweet spot for spare ribs.
After two hours, carefully remove the wrapped ribs from the smoker. Open the foil (watch out for the hot steam — it will billow out) and check the meat. It should look visibly more tender, and the surface will appear wet and pale because the bark softened in the steam. Don’t panic. The next hour fixes this.
Phase 3: The Glaze (1 Hour)
Unwrap your ribs and place them back on the smoker grate, meat-side up again. Now it’s time for sauce.
Using a basting brush, apply a generous coat of your barbecue sauce to the top and sides of the ribs. You want enough to see a visible glaze, but not so much that it pools and drips everywhere.
Close the lid and let the ribs cook for 30 minutes. Then open up, apply a second coat of sauce, close the lid again, and finish the final 30 minutes.
During this last hour, several things happen simultaneously. The bark firms back up as moisture evaporates from the surface. The sugars in your barbecue sauce caramelize, creating that sticky, slightly tacky texture that’s so satisfying to bite into. And the ribs reach their final level of tenderness.
Did you know? You can bump the smoker temperature up to 250°F–275°F during this final hour to speed up sauce caramelization without negatively affecting the meat’s texture. The ribs are already fully tender from the wrapping phase — a slightly higher temperature just helps the sauce glaze faster and develop a deeper color.
At the end of this hour, your ribs should have a deep, lacquered appearance. The sauce should be set — not wet and runny, but sticky and caramelized. If you pick up the rack with tongs from the middle, it should bend and flex without breaking apart. That flexibility is actually a classic doneness test for ribs.
How to Tell When Your 3-2-1 Ribs Are Done
Timing is a great guideline, but ribs are done when they’re done — not necessarily at exactly the six-hour mark. Here are the most reliable ways to check.
The bend test is the easiest visual check. Pick up the rack with tongs at about the midpoint. If the rack bends deeply and the meat starts to crack on the surface but doesn’t break in half, you’re right where you want to be. If it’s stiff and barely bends, it needs more time. If it breaks apart, you went a little long (it’ll still taste good, though).
Internal temperature should read between 195°F and 205°F when you probe between the bones in the thickest section of meat. Below 190°F, the collagen hasn’t fully broken down. Above 210°F, you’re approaching overcooked territory.
The toothpick test is another reliable method. Slide a toothpick or probe into the meat between two bones. It should slide in with very little resistance — like pushing into room-temperature butter. If there’s significant resistance, the connective tissue hasn’t fully rendered yet.
Resting and Serving Your Ribs
Once you pull the ribs off the smoker, let them rest for 10 to 15 minutes before cutting. Resting allows the juices to redistribute through the meat. If you cut immediately, those juices run out onto the cutting board instead of staying in the rib.
To slice, flip the rack bone-side up. You can see the bones clearly from this side. Use a sharp chef’s knife or a good carving knife and cut between each bone. Some people prefer to serve in half-rack portions (about 5-6 bones), which makes for a more dramatic presentation.
Serve your ribs with a few great BBQ side dishes — coleslaw, baked beans, cornbread, mac and cheese, or a simple green salad all pair perfectly. And keep extra sauce on the table for anyone who wants to double-dip.
When Should You NOT Use the 3-2-1 Method?
The 3-2-1 method isn’t perfect for every situation, and it’s worth understanding its limitations.
Baby back ribs are thinner and leaner than spare ribs. Six hours at 225°F is too long for them. They’ll turn to mush. If you’re cooking baby backs, the 2-2-1 method cuts the smoke phase by an hour and gives you much better results.
Beef ribs operate under completely different rules. They’re thicker, denser, and have different collagen structures than pork ribs. If you’re deciding between the two, check out this helpful comparison of beef ribs vs pork ribs to understand the differences.
Competition-style ribs typically skip the foil wrap entirely. Many barbecue competition teams prefer an unwrapped cook because the foil can make the bark too soft. They’ll smoke spare ribs for 5-6 hours unwrapped, spritzing occasionally, and accept a slightly firmer bite in exchange for a crunchier bark. If you’re cooking for competition judges who prefer a clean bite (meat pulls away cleanly from the bone rather than falling off), you might want to experiment with going foilless.
For backyard cooking where you want the maximum tender, juicy, crowd-pleasing experience? The 3-2-1 method is still hard to beat.
Troubleshooting Common 3-2-1 Rib Problems
Even with a straightforward method like this, things can go sideways. Here’s how to fix the most common issues.
Ribs are tough and chewy. This almost always means your smoker temperature was too low, or you didn’t wrap long enough. If your smoker dipped below 200°F for extended periods during the cook, the total time wasn’t sufficient to break down collagen. Solution: make sure you’re maintaining a steady 225°F throughout. A wireless meat thermometer helps you monitor both meat and smoker temps without babysitting the grill.
Ribs are mushy and falling apart. You likely left them wrapped too long, or your smoker was running hotter than you thought. At 250°F instead of 225°F, that two-hour wrap phase might effectively cook the ribs as if they were wrapped for three hours at 225°F. Keep your temps consistent.
Bark is too soft. The wrapping phase softens bark — that’s unavoidable. But if your bark is practically nonexistent after the final hour, try increasing the temperature to 275°F during Phase 3, and make sure you’re applying sauce in thin layers rather than drowning the ribs.
Ribs taste too smoky or bitter. You’re probably using too much wood, or you’re producing dirty smoke (thick, white smoke rather than thin, blue smoke). Thin blue smoke is what you want — it means clean combustion. White billowing smoke contains creosote, which tastes acrid and harsh. Use less wood and make sure your fire has good airflow.
Sauce burned and turned black. Sugar-heavy sauces applied too early will scorch over long cook times. Save the sauce for the final hour only. You can also thin your sauce slightly with apple juice or vinegar if it’s exceptionally thick.
FAQ
Can I use the 3-2-1 method on a gas grill?
Yes, but you’ll need to set up indirect heat. Light one side of the burners and place the ribs on the unlit side. Add a smoker box or a foil pouch filled with wood chips over the lit burner to generate smoke. Maintaining 225°F on a gas grill takes some practice with vent and burner adjustments, but it’s definitely doable. If you need help picking one, here’s a guide to the best gas grills worth considering.
Do I have to use foil, or can I wrap with butcher paper?
You can use butcher paper, but the results will be slightly different. Butcher paper is porous — it lets some moisture escape, which means the bark stays firmer but the tenderizing effect isn’t quite as dramatic as foil. If you prefer a more pronounced bark and don’t mind sacrificing a small amount of tenderness, butcher paper is a great middle ground. For the classic 3-2-1 result, foil is the standard choice.
What if I don’t want to use sauce on my ribs?
That’s perfectly fine. During the final hour, you can skip the sauce entirely and just let the bark re-crisp on its own. Some pitmasters prefer “dry ribs” finished with an extra dusting of rub instead of sauce. Memphis-style ribs are a famous example of this approach — heavy on the dry rub, no sauce, and absolutely delicious.
Can I prep ribs the night before and smoke them the next day?
Absolutely. Apply your rub the night before and refrigerate the ribs uncovered on a sheet pan. The overnight rest lets the seasoning penetrate deeper, and the uncovered surface dries out slightly, which actually helps you develop a better bark during the smoke phase. Pull the ribs out of the fridge about 30-45 minutes before they go on the smoker so they aren’t ice cold.
How do I know if my smoker is running at the right temperature?
Built-in smoker thermometers are notoriously inaccurate. They’re usually mounted in the lid, far from where your meat actually sits, and can be off by 25-50 degrees. Use a separate probe thermometer clipped to the grate at meat level for a true reading. A good wireless thermometer lets you monitor the temp from inside your house without constantly checking the smoker.
Your First 3-2-1 Cook Starts Now
The 3-2-1 method has stuck around for years because it just works. It takes a process that can feel intimidating — smoking ribs low and slow for hours — and turns it into something anyone can follow. Three hours of smoke, two hours in foil, one hour of sauce. That’s your entire game plan.
Don’t worry about getting it absolutely perfect on your first try. Even a slightly overcooked or under-sauced rack of 3-2-1 ribs will still taste better than almost anything you could buy at a restaurant. And once you’ve done it once, you’ll know exactly what to tweak next time — a little more rub, a different wood, a spicier sauce, maybe a slightly shorter wrap.
Grab a rack of spare ribs this weekend. Fire up your smoker. Trust the process. Six hours from now, you’ll be eating some of the best ribs you’ve ever made.